Workshift follow-up
Introduction
Section titled “Introduction”Go to Users → Workshift follow-up.
Select time period
Section titled “Select time period”You have several relative time periods to choose from

Customized will allow you to choose specific start and end dates via a calendar function.
Click Download symbol.
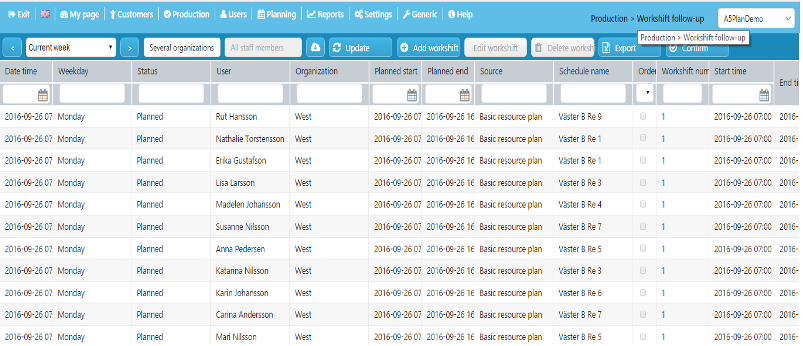
This will allow you to view a list of planned and performed workshifts, like the one above. The performed workshifts can be according to a schedule or outside of schedule.
Confirm workshift
Section titled “Confirm workshift”Select a row there status is Ended for workshift and click on Confirm to attest the workshift. Accept or change settings in form.
Edit workshift
Section titled “Edit workshift”Select a row with status Ongoing or Ended or workshift and click on Edit workshift to add or change the times of the shift. Change settings in form.
Add workshift
Section titled “Add workshift”Select a row with status Planned for workshift and click Add workshift to confirm the planned workshift. Accept or change default settings in form.
Status will change to Ended.
Filter data
Section titled “Filter data”Now you can filter the data to show what is relevant to you.
Filter on
- weekdays
- status Planned, Ongoing or Ended
- staff member who or which staff members you want to view
- organization unit (can be selected when searching)
- planned start planned start time
- planned end planned end time
- source Basic resource plan, Daily planning or Work hour schedule
- schedule name schedule including schedule row
etcetera.
Delete workshift
Section titled “Delete workshift”You can delete a ongoing or ended workshift. Select workshift and click on Delete. Planned workshifts can not be deleted here, delete them there they are planned.
Delete more than one workshift
Section titled “Delete more than one workshift”You can now select more than one to delete at tha same time.
Click on button Trash can + ai, and you will get tick boxes on left side to mark what you will delete.
Click on button Trash can + Seleced. Only ongoing and ended can be deleted.
Export
Section titled “Export”You can save the sourced data as an Excel file (.xlsx). Click Export in the menu.
Choose name and where on your computer to save it.
Save as shortcut
Section titled “Save as shortcut”You can save chosen filters as a shortcut in the panel.
This will make it possible to create a shortcut for, say, work hours for a specific organization unit from previous month. This information will then be reachable from the panel, always showing previous month’s workshifts for a specific unit, whatever current month.
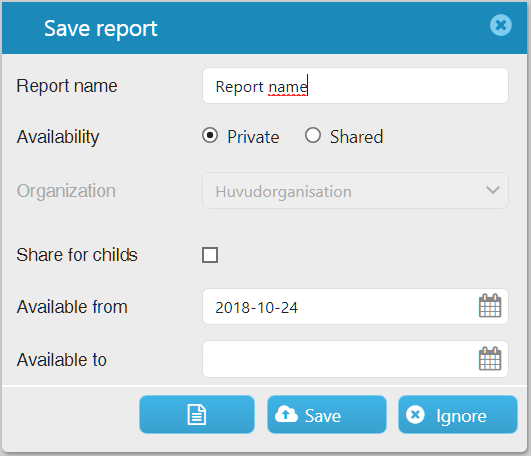
Click Save report in the lower left corner.

Choose a name for the shortcut and if it to be Private or Shared. Private shortcuts are only available to the creator, while Shared ones are available to everyone in the same or any superior organization unit.
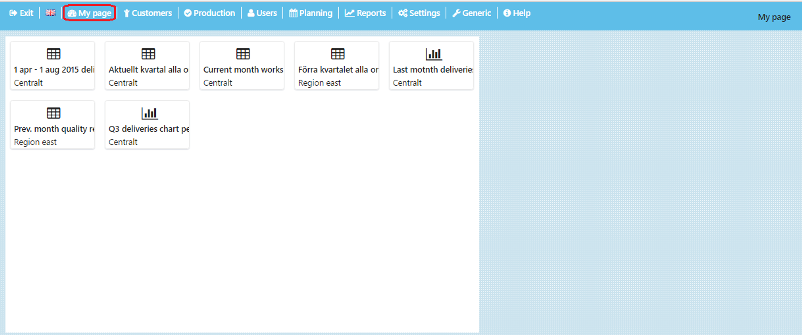
My page
Section titled “My page”You will be able to reach your shortcut from the My page in the top menu.